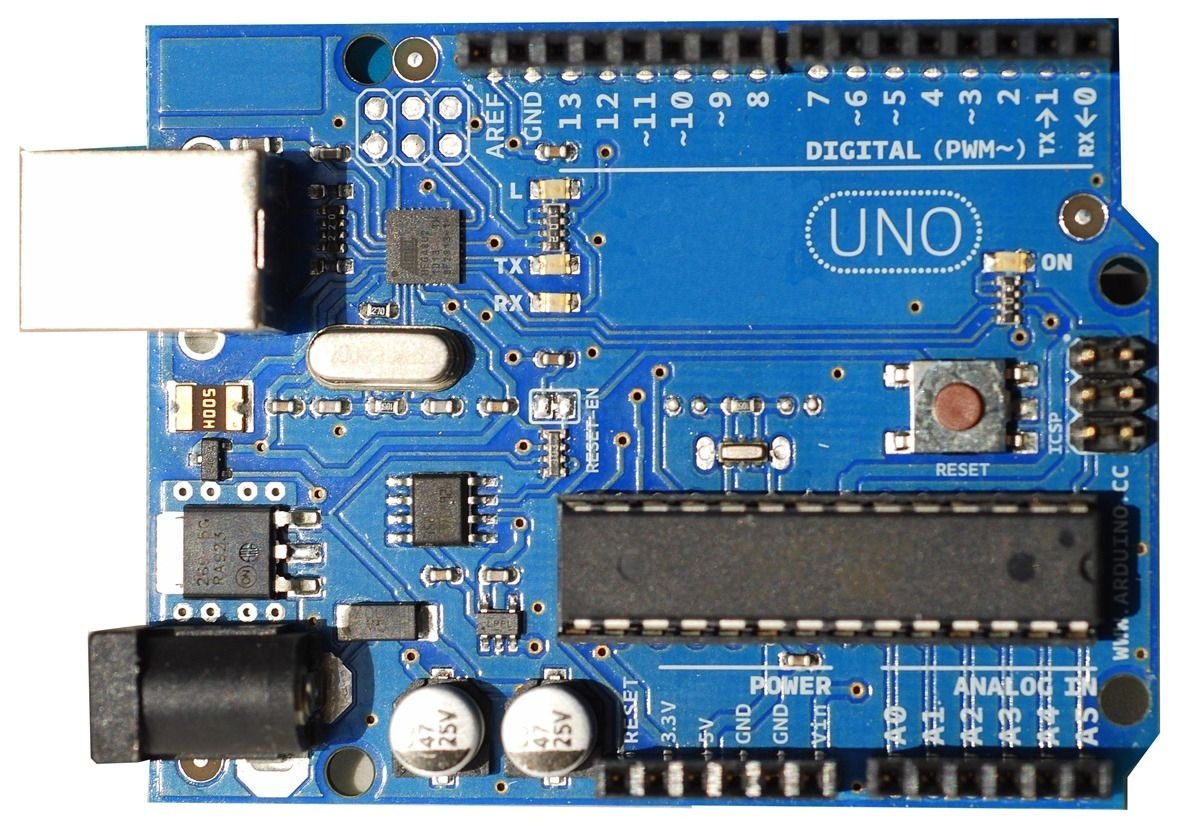
The Arduino Uno is an open-source microcontroller board based on the Microchip ATmega328P microcontroller and developed by Arduino.cc. The board is equipped with sets of digital and analog input/output (I/O) pins that may be interfaced to various expansion boards (shields) and other circuits.The board has 14 digital I/O pins (six capable of PWM output), 6 analog I/O pins, and is programmable with the Arduino IDE (Integrated Development Environment), via a type B USB cable. It can be powered by the USB cable or by an external 9-volt battery, though it accepts voltages between 7 and 20 volts. It is similar to the Arduino Nano and Leonardo. The hardware reference design is distributed under a Creative Commons Attribution Share-Alike 2.5 license and is available on the Arduino website. Layout and production files for some versions of the hardware are also available.
The Arduino application allows its users to program their UNO boards to serve the function based on the code that is embedded to it. There are a lot of things that can be done just by coding. For example, you can create a light source, a moving mechanism, a motion sensor and so much more. There are numerous websites providing you with the codes to serve the function you desire. The only limit is your imagination and creativity!
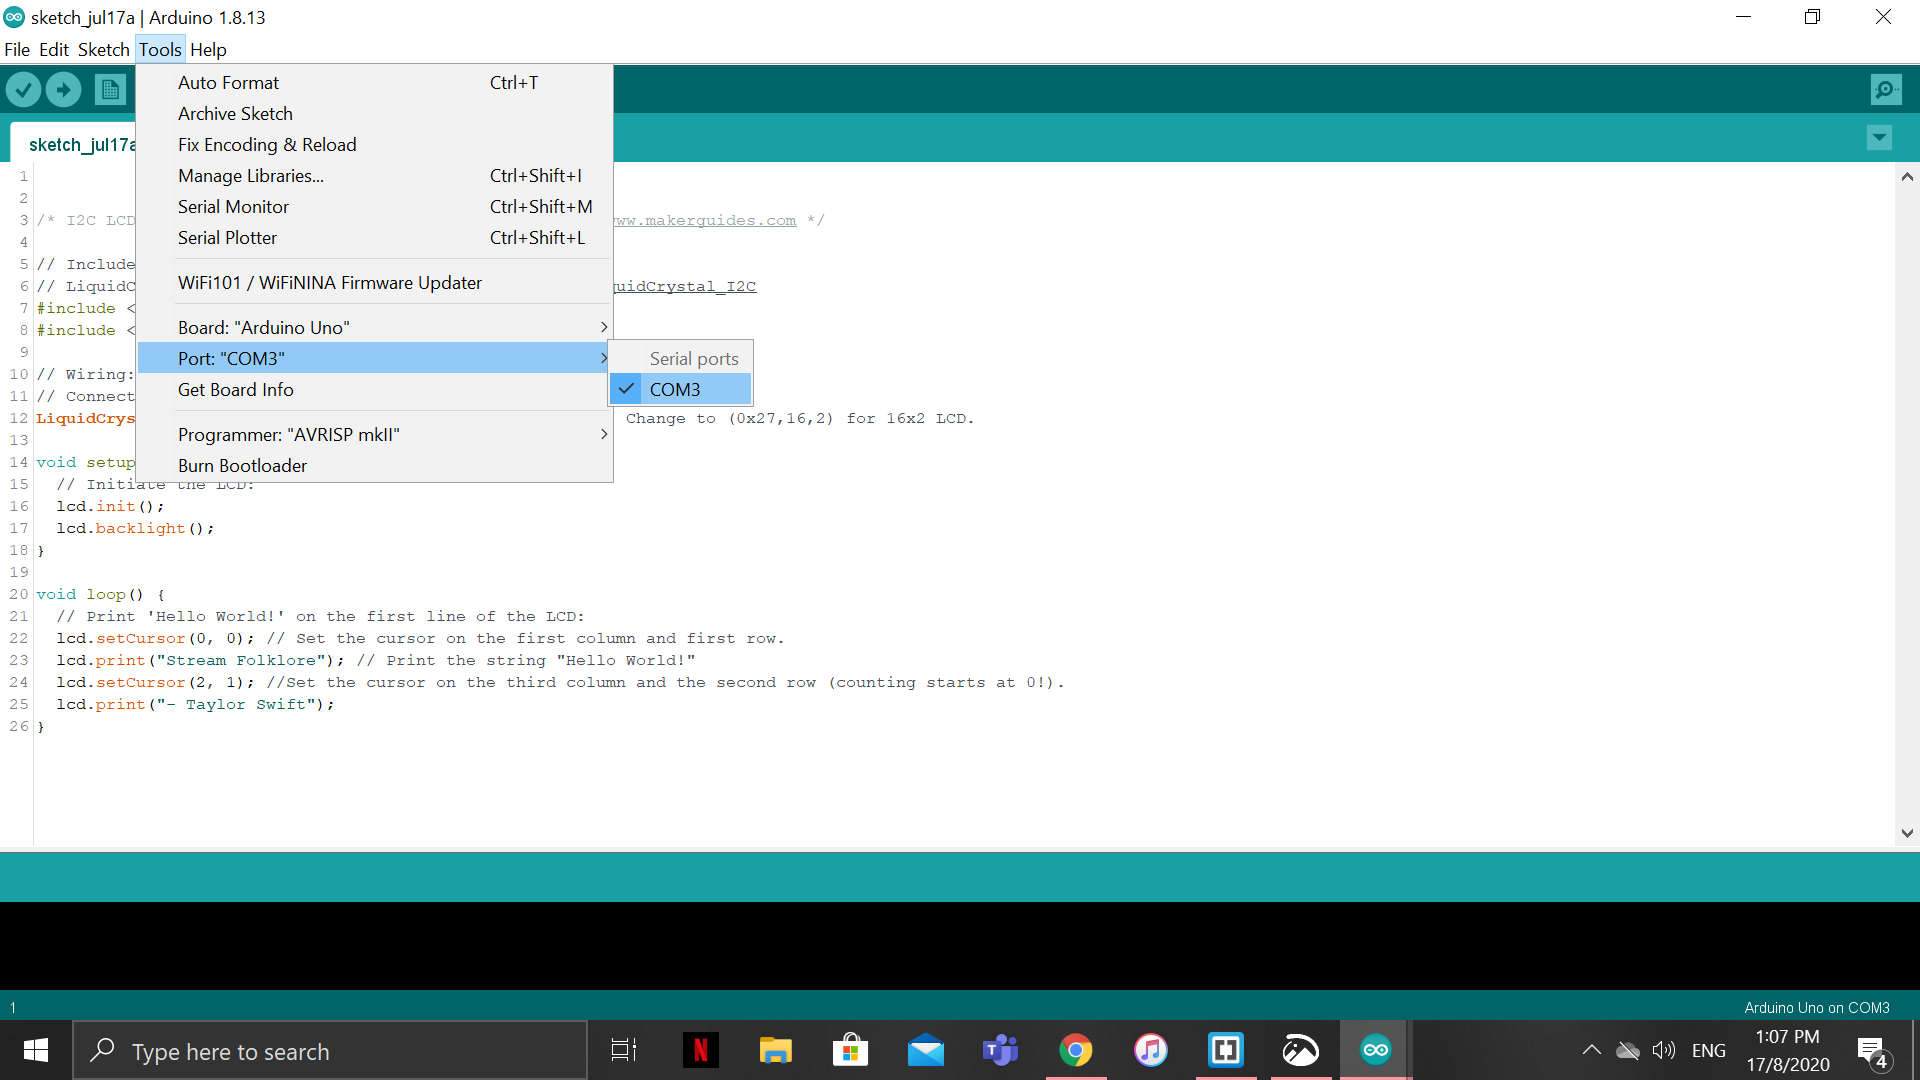
Once you have your UNO board with you, connect it to your PC and boot up Arduino. Move your cursor over to the tab "Tools" and then move it to the "Port" option. Select your UNO Board from there. This is done so that Arduino can upload the code you have programmed onto the UNO Board.
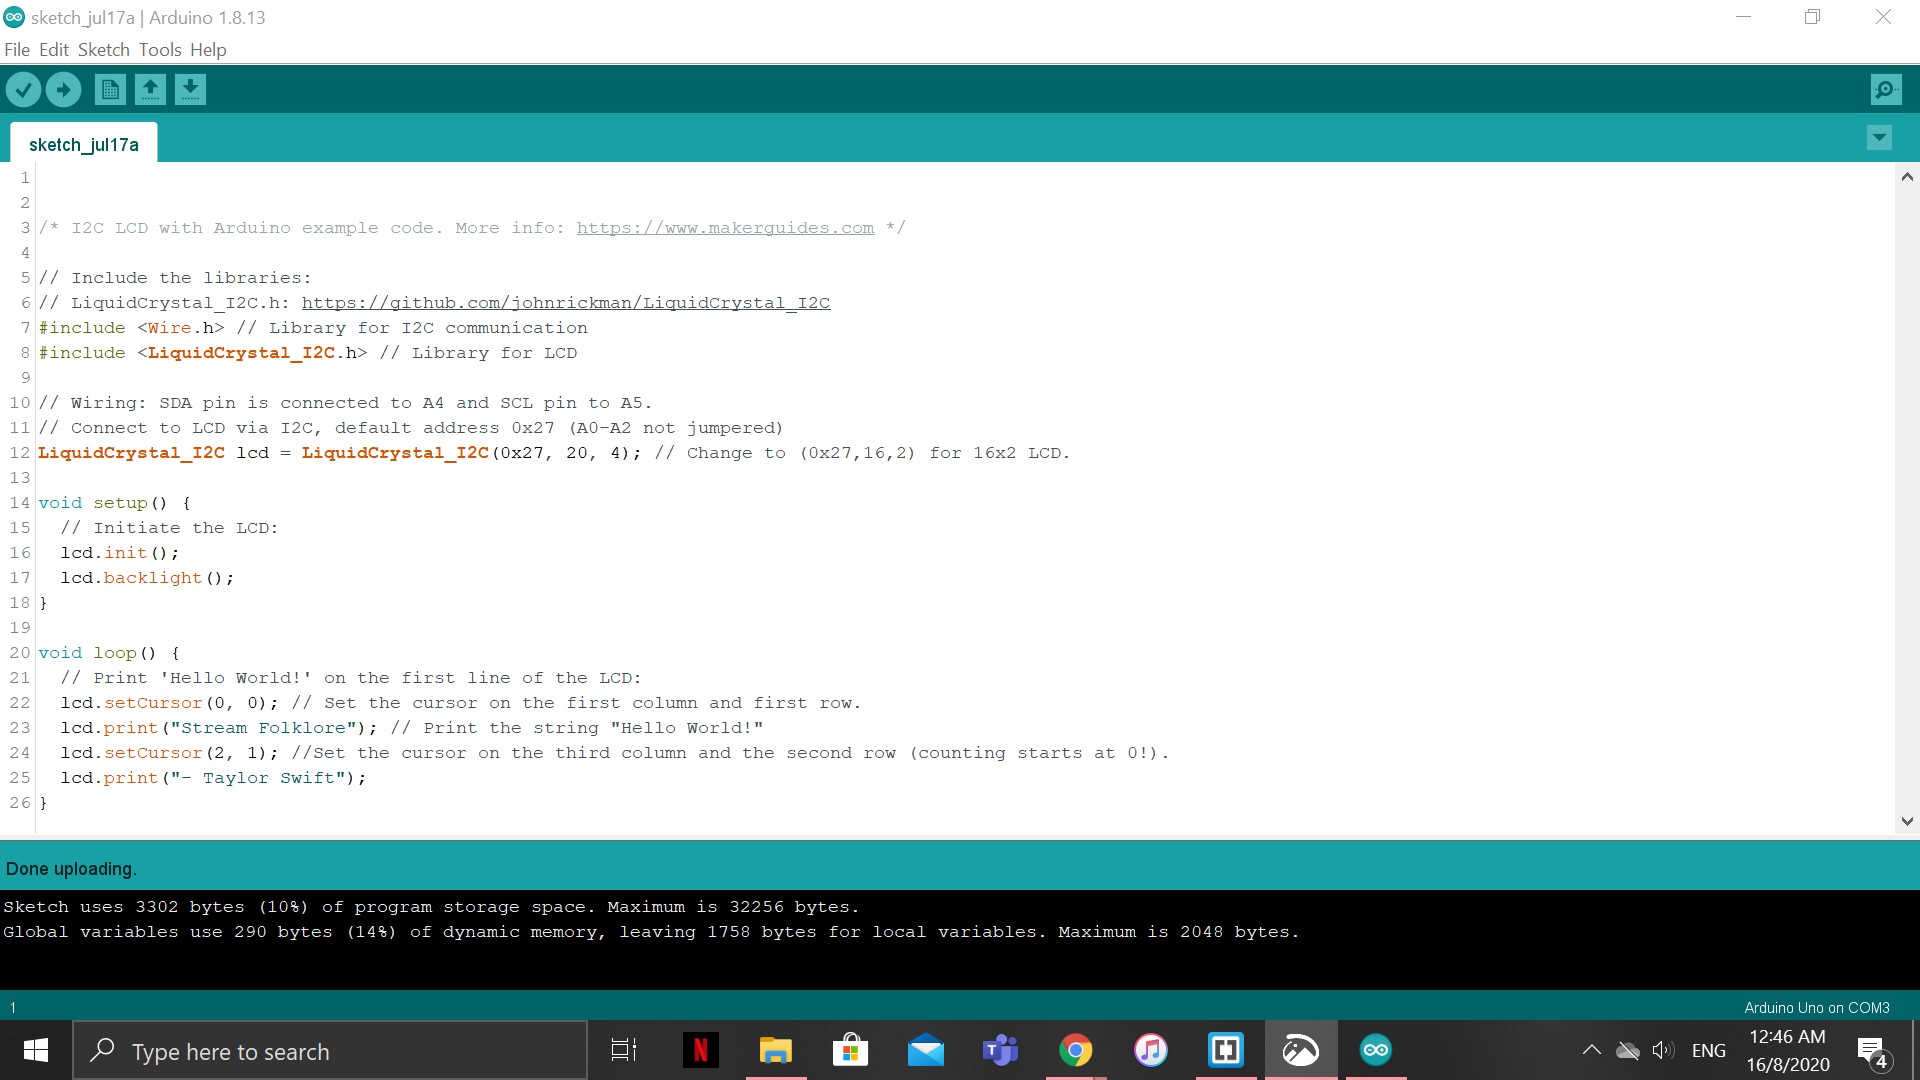
The picture above shows the coding to serve an LED display. This can be use for numerous occasion; on an alarm clock, on a fridge, on a calculator and many other daily objects.
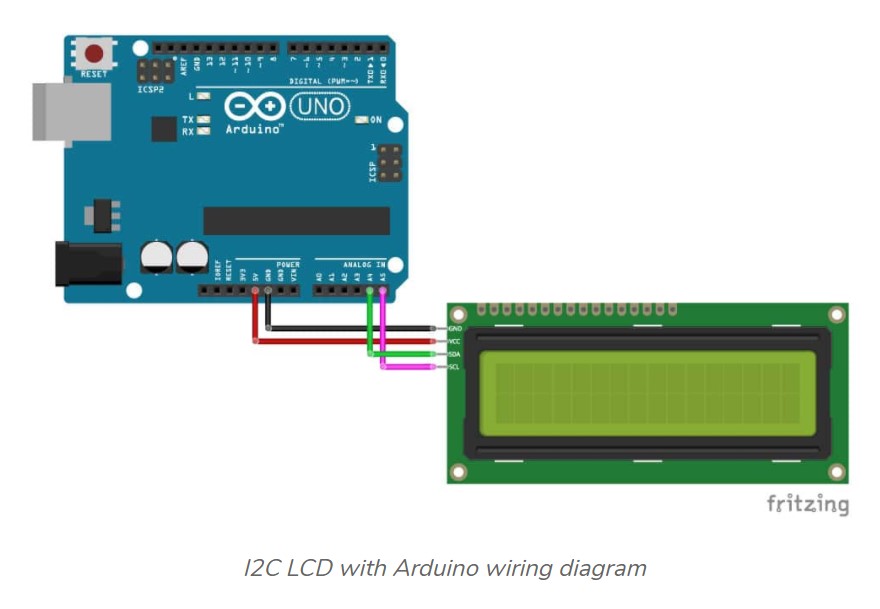
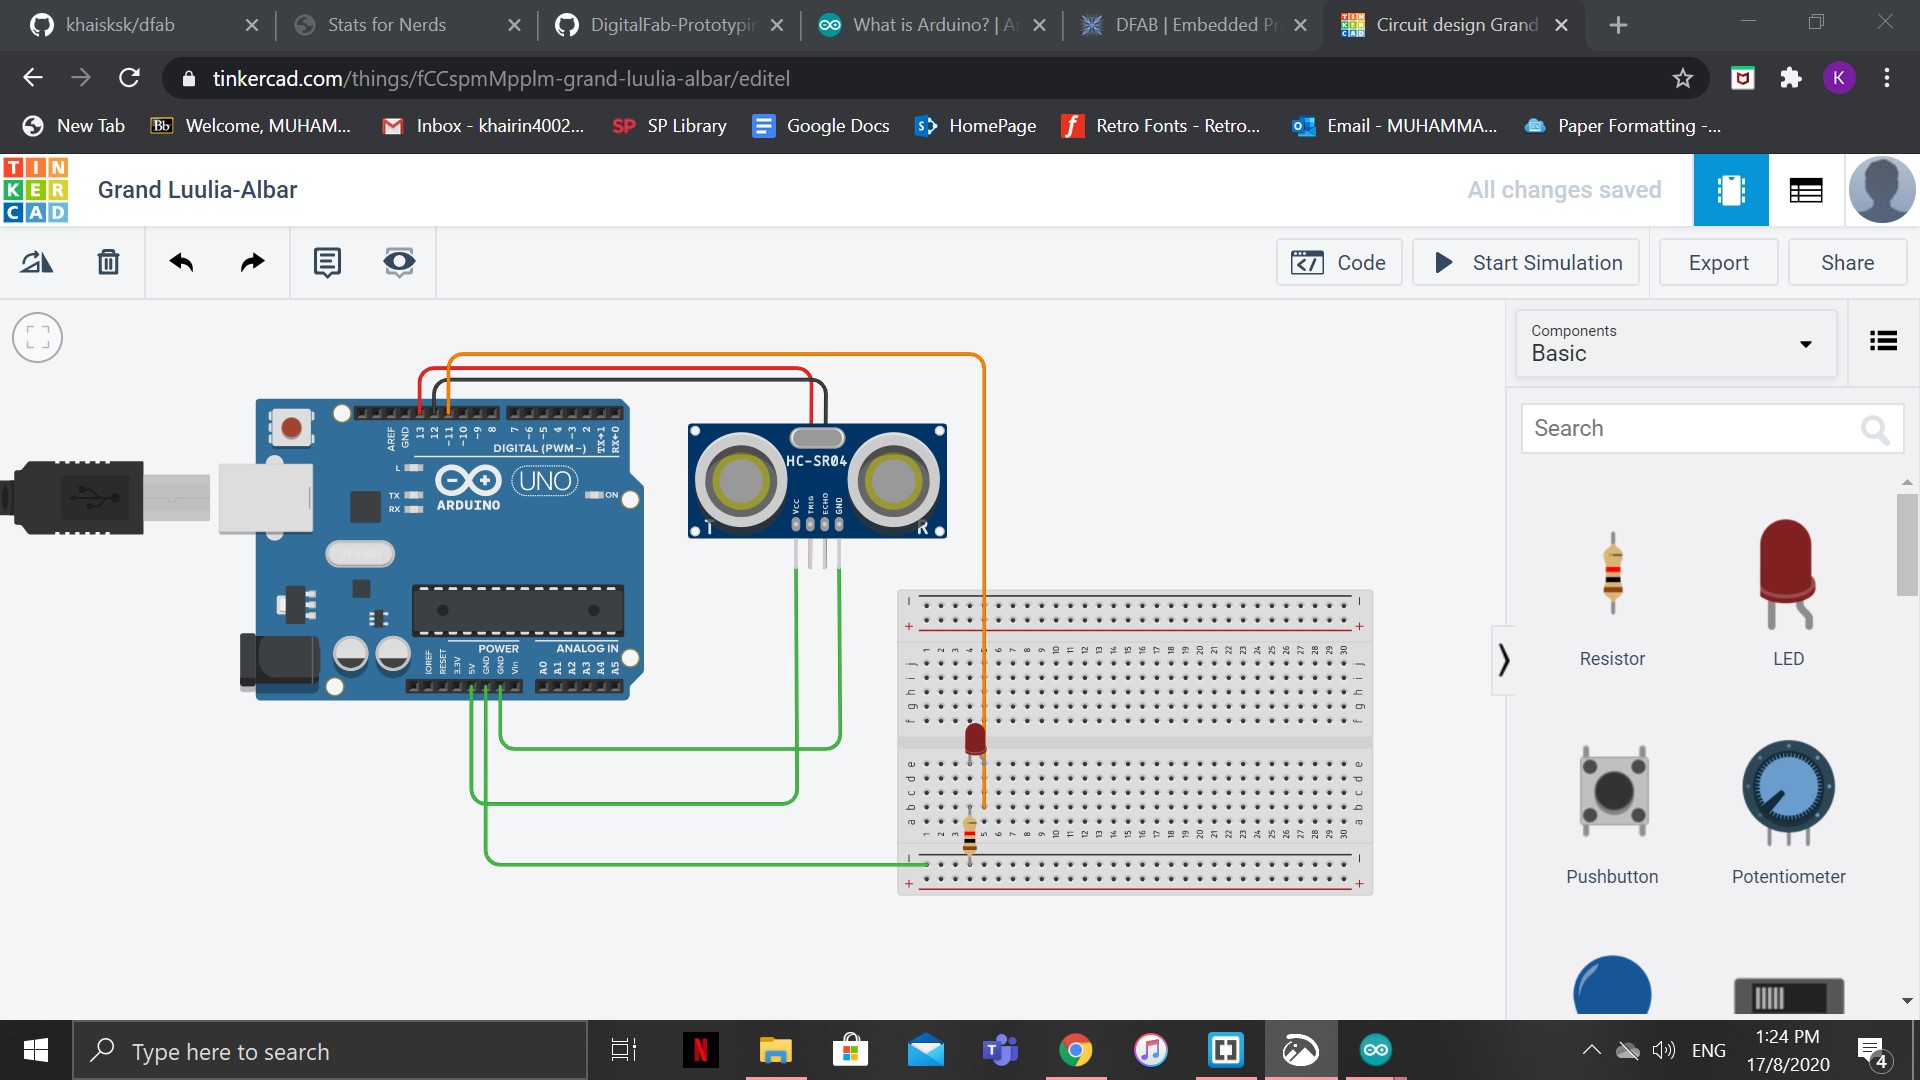
The picture above shows how you should wire the UNO Board to the display.
After completing the wiring, make sure you "Verify" and "Upload" the code so that it is uploaded onto the UNO Board. "Verify" is the first tab. "Upload" is the second tab. Once this is completed, your tech should be functioning properly! The video can be seen below!
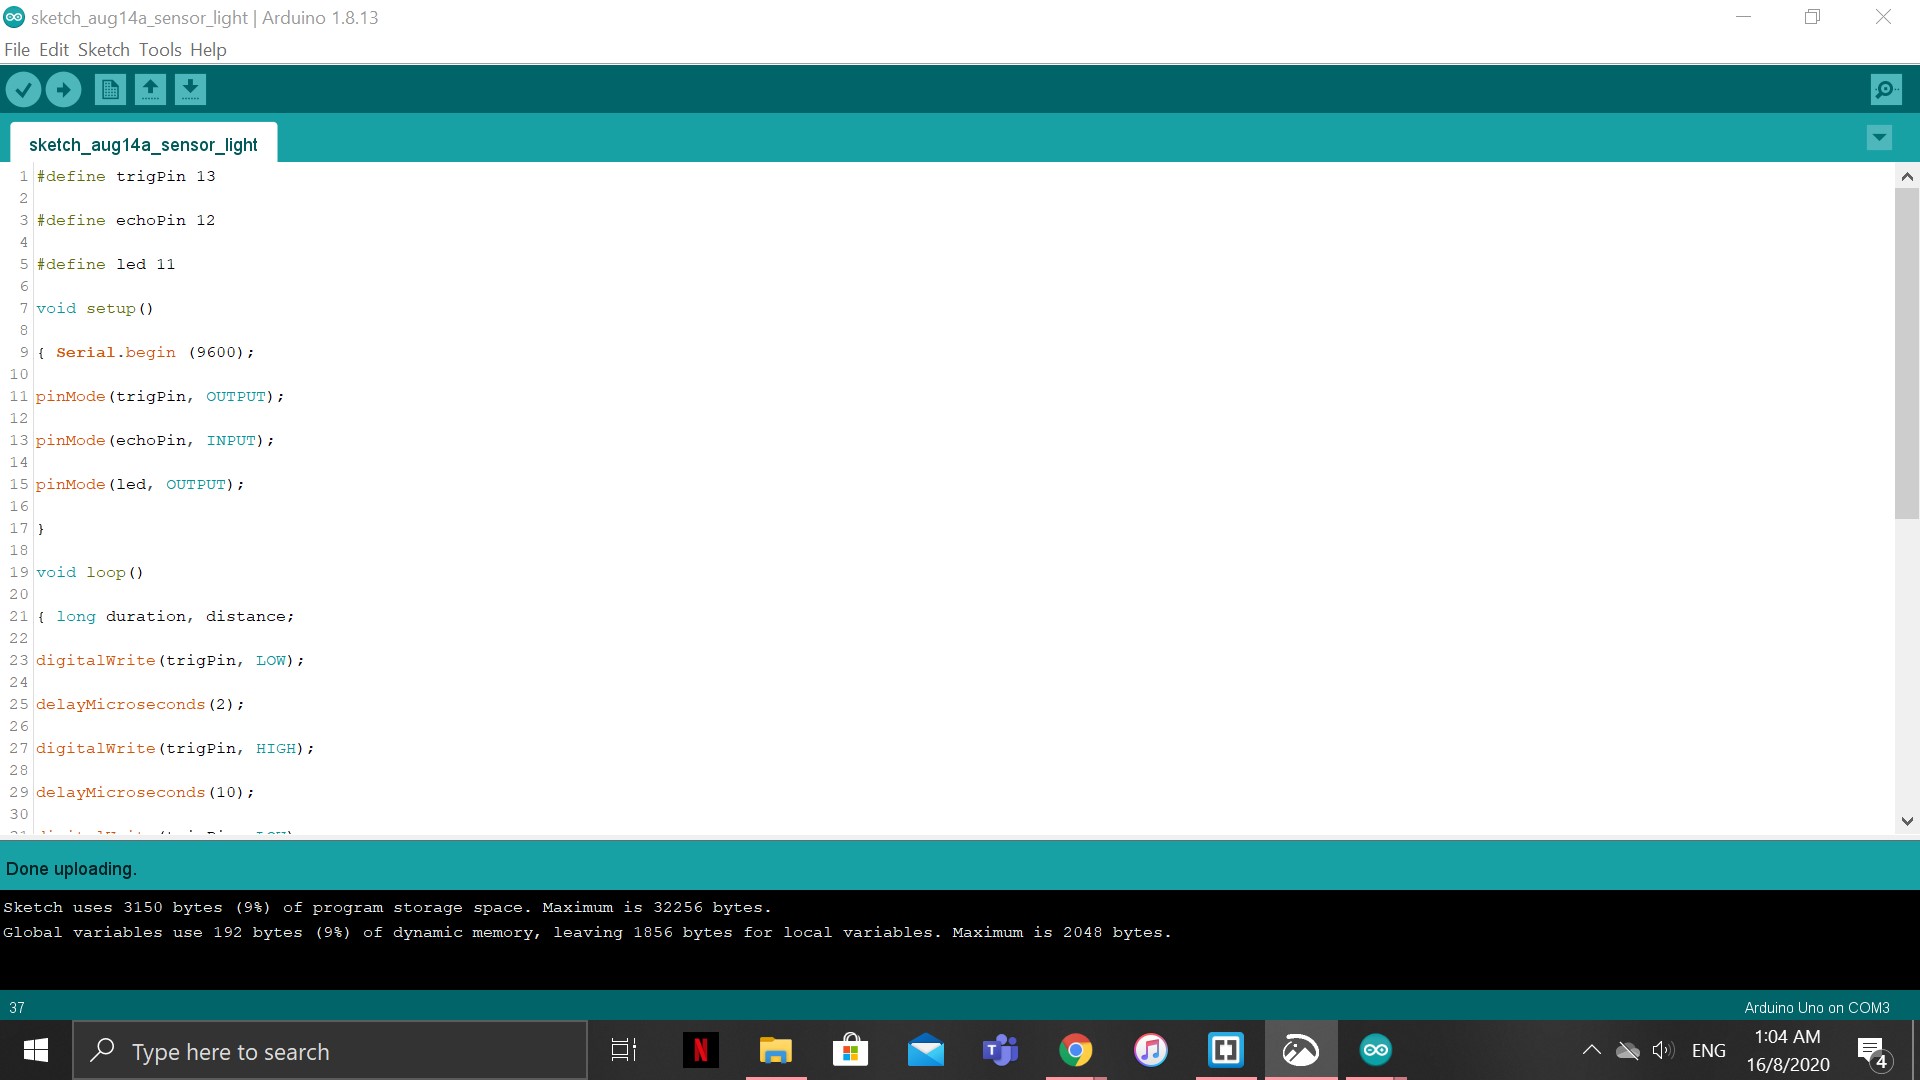
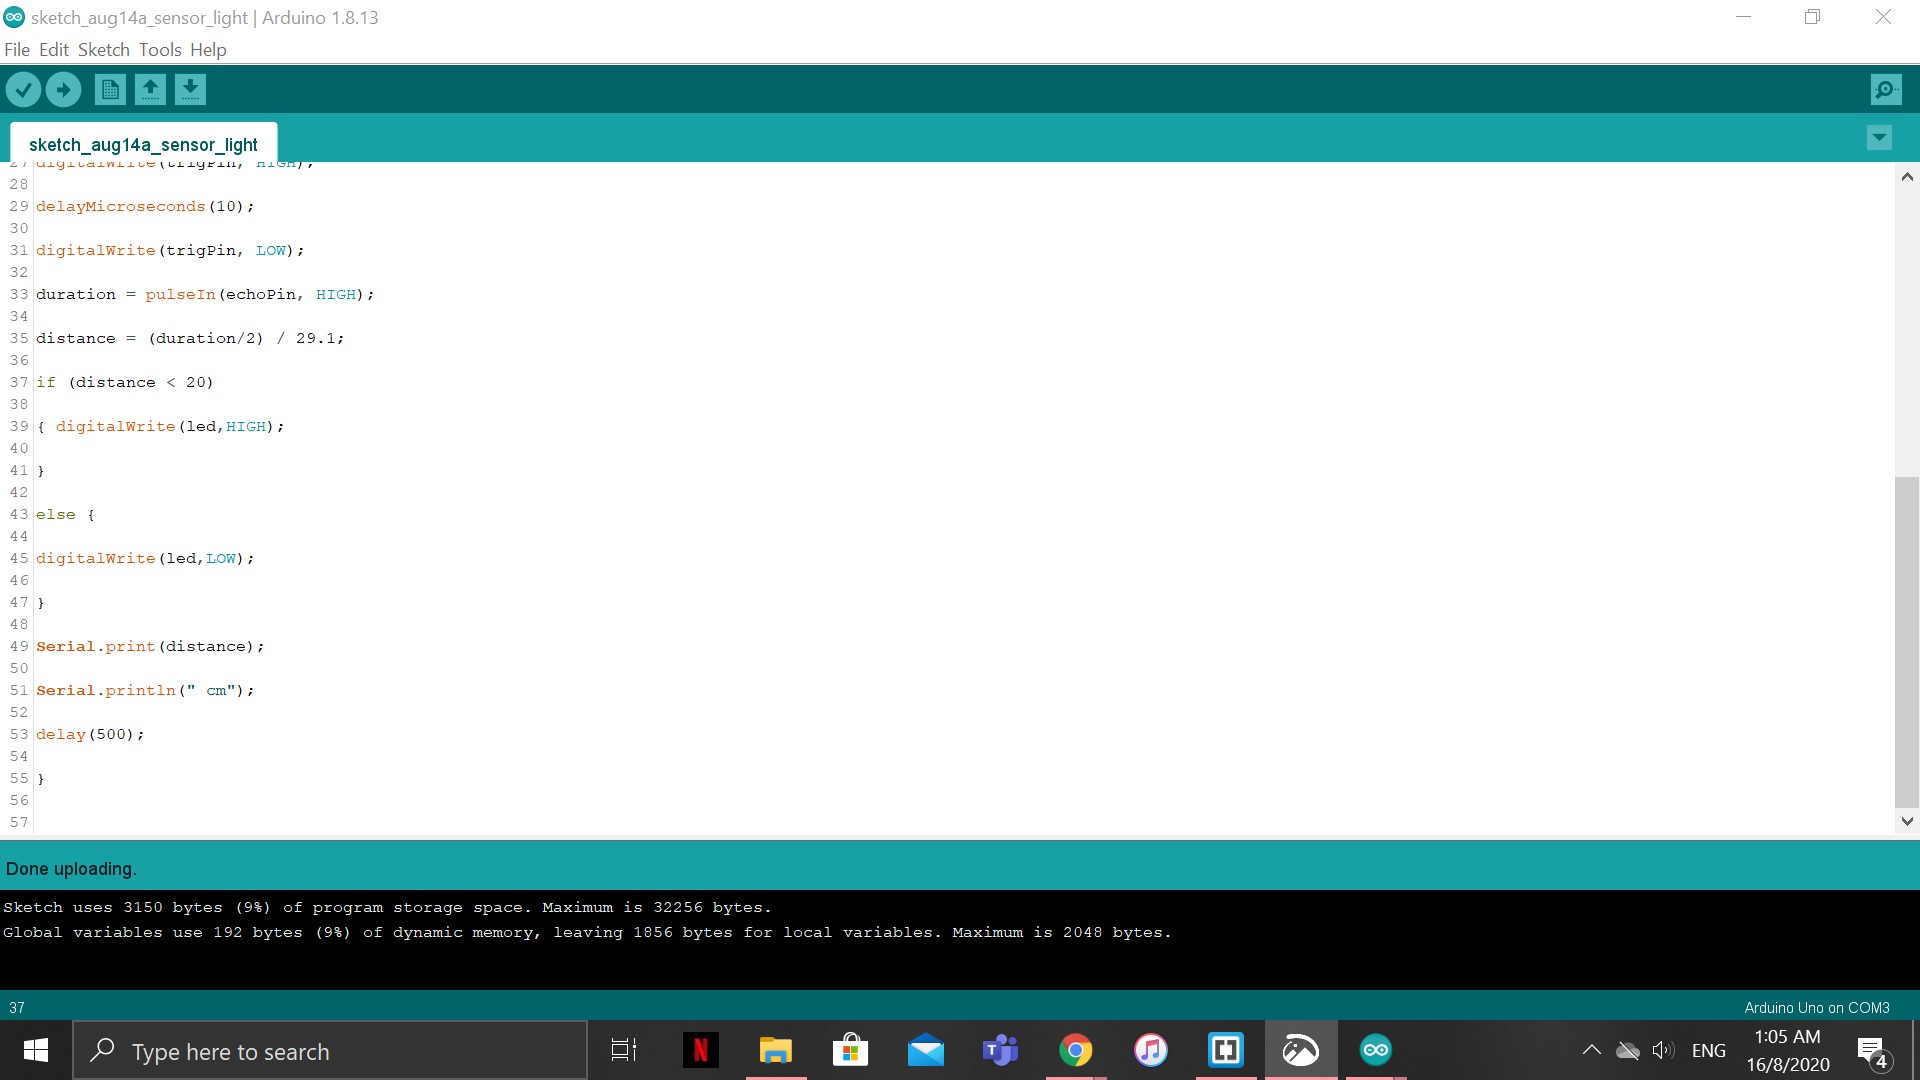
The picture above shows the coding to serve a Light Sensor. A light sensor can be found in most areas around the country such as in toilets, hallways and staircases. This helps to save a little electricity and to only function when there is movement in the area.
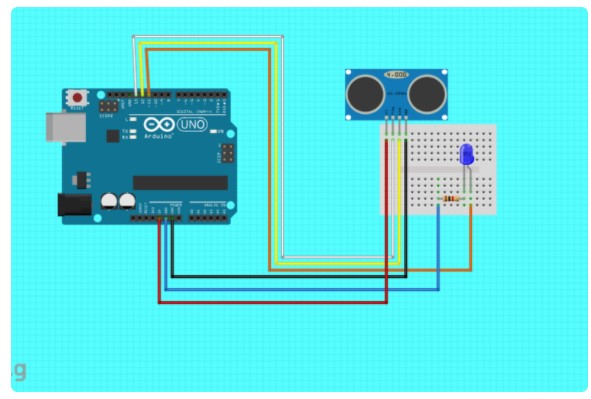
The picture above shows how you should wire the UNO Board to the sensor and the light source.
After completing the wiring, make sure you "Verify" and "Upload" the code so that it is uploaded onto the UNO Board. "Verify" is the first tab. "Upload" is the second tab. Once this is completed, your tech should be functioning properly! The video can be seen below!
Alternatively, if you don't have the resources to work with, you can head over to TinkerCAD. They have a lot of the resources and UNO Boards for you to tinker with. You can also use TinkerCAD to try out your codes before doing it with the actual product to see if it works!