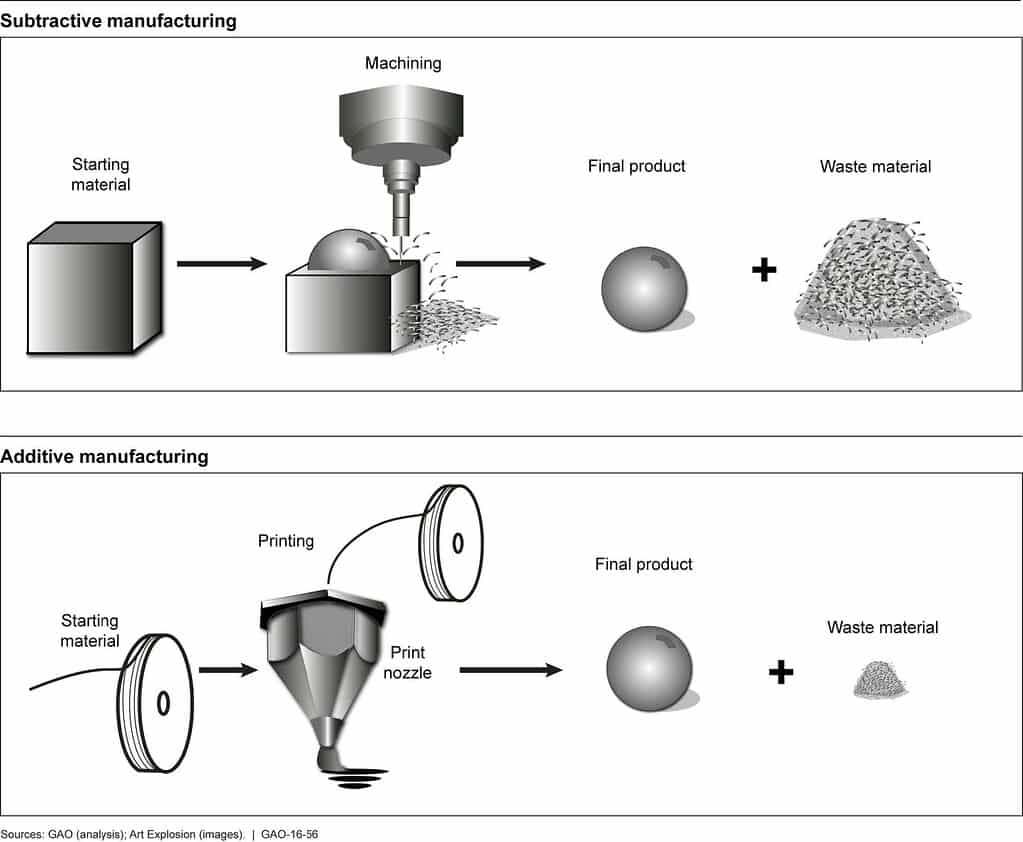
Additive manufacturing is any process in which parts are produced by depositing material to create the desired shapes. 3D printing is the most common additive manufacturing process, but other examples might include welding or sculpture modeling (by adding clay or similar materials).
Usually, the term additive manufacturing applies only when the process is automated or computer controlled, ensuring that parts are precisely made (within certain tolerances). Thus, in the strictest sense, welding by a human wouldn’t normally be considered additive manufacturing.
Subtractive manufacturing is any process in which parts are produced by removing material from a solid block to produce the desired shape. This is primarily done using computer numerical control (CNC) machines, which utilize various tools that are able to move and cut in three dimensions. Laser cutters are also commonly used for subtractive manufacturing. Electrical discharge machining (EDM) is another subtractive manufacturing process.
Similar to the term additive manufacturing, a process is typically only labeled subtractive manufacturing when it is automated or computer controlled. As such, handmade carving or the operation of a lathe, drill press, or saw would usually not be referred to as subtractive manufacturing.
3D Printing allows individuals to have complete control of the design and freedom to do so. It also has a faster production rate as compared to products that don't use 3d printing. Furthermore, its users can customize the print anyway they want to, adjusting wherever they think needs amendment. As an effort towards as greener earth, 3D Printing is safer as it produces less waste which would reduce the waste thrown. The materials used is also not very hard to create and therefore, 3D Printing is a much better way to create a product!
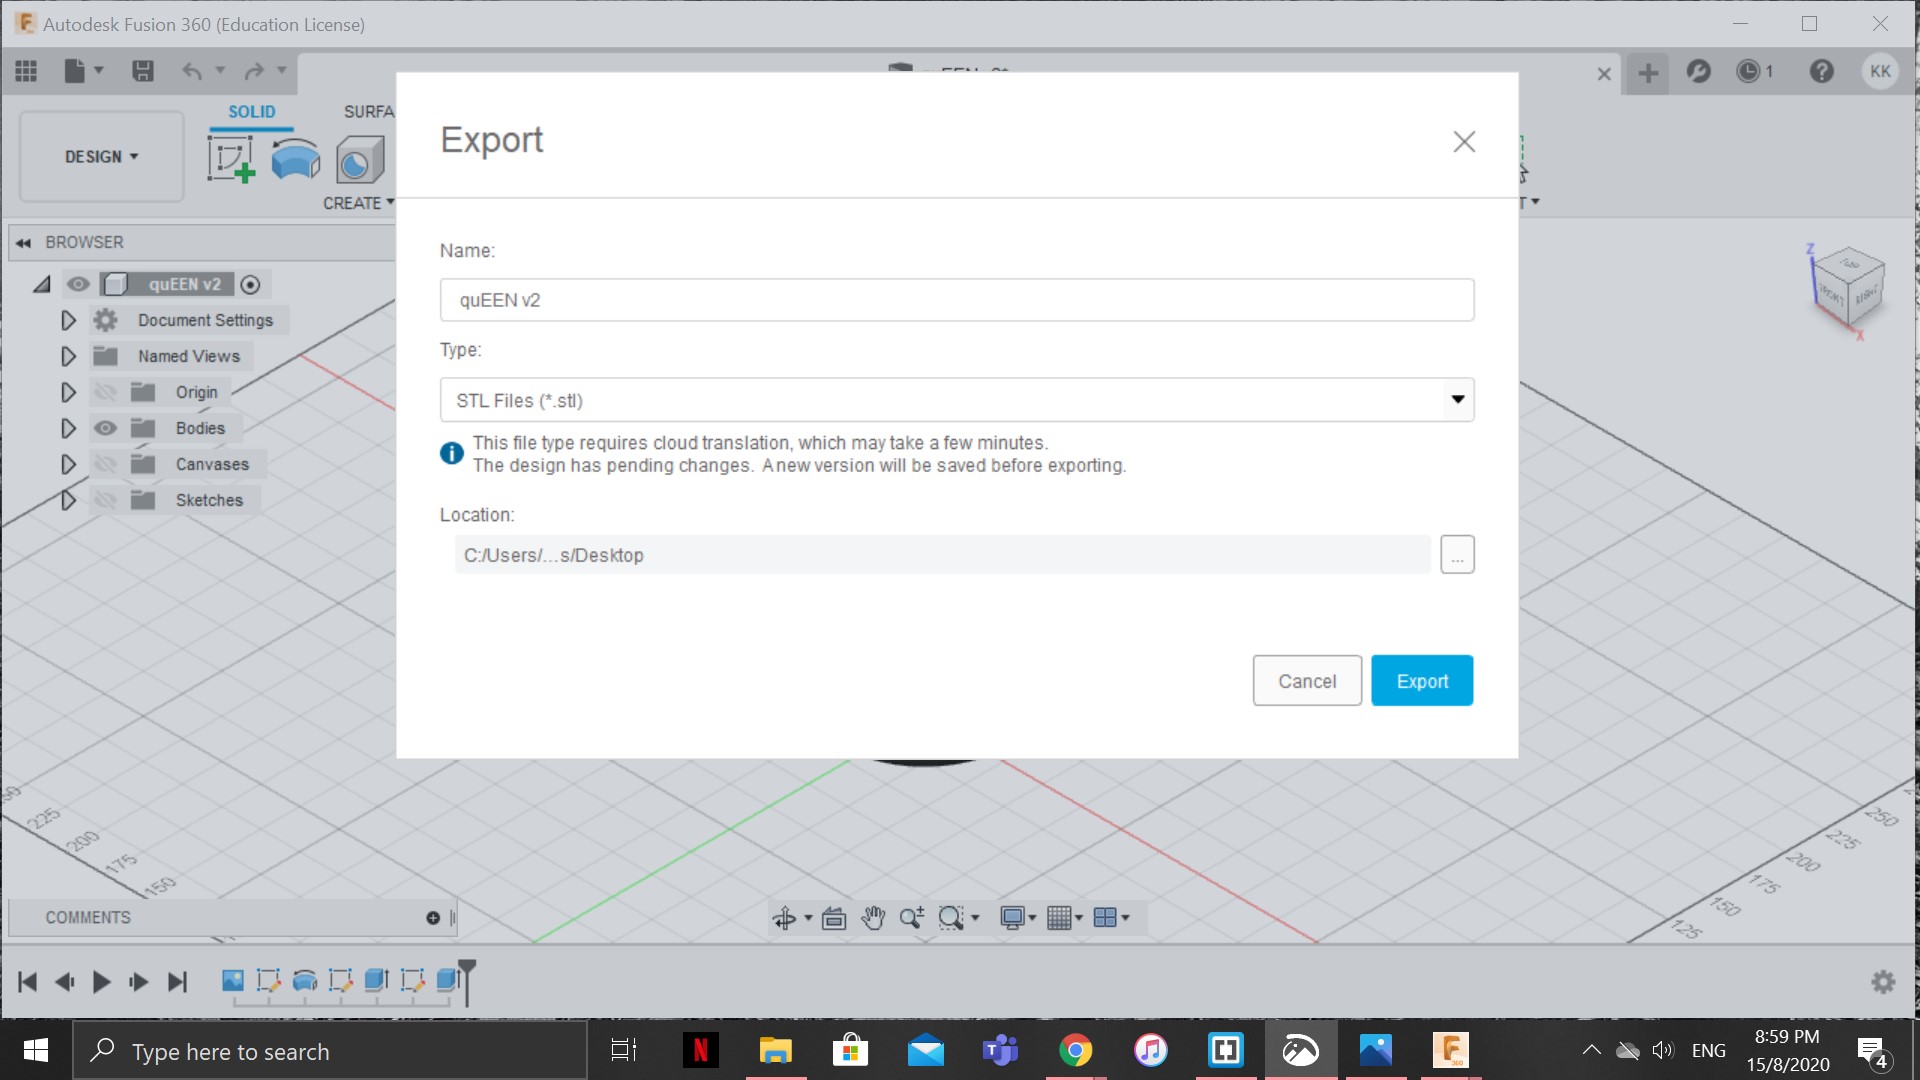
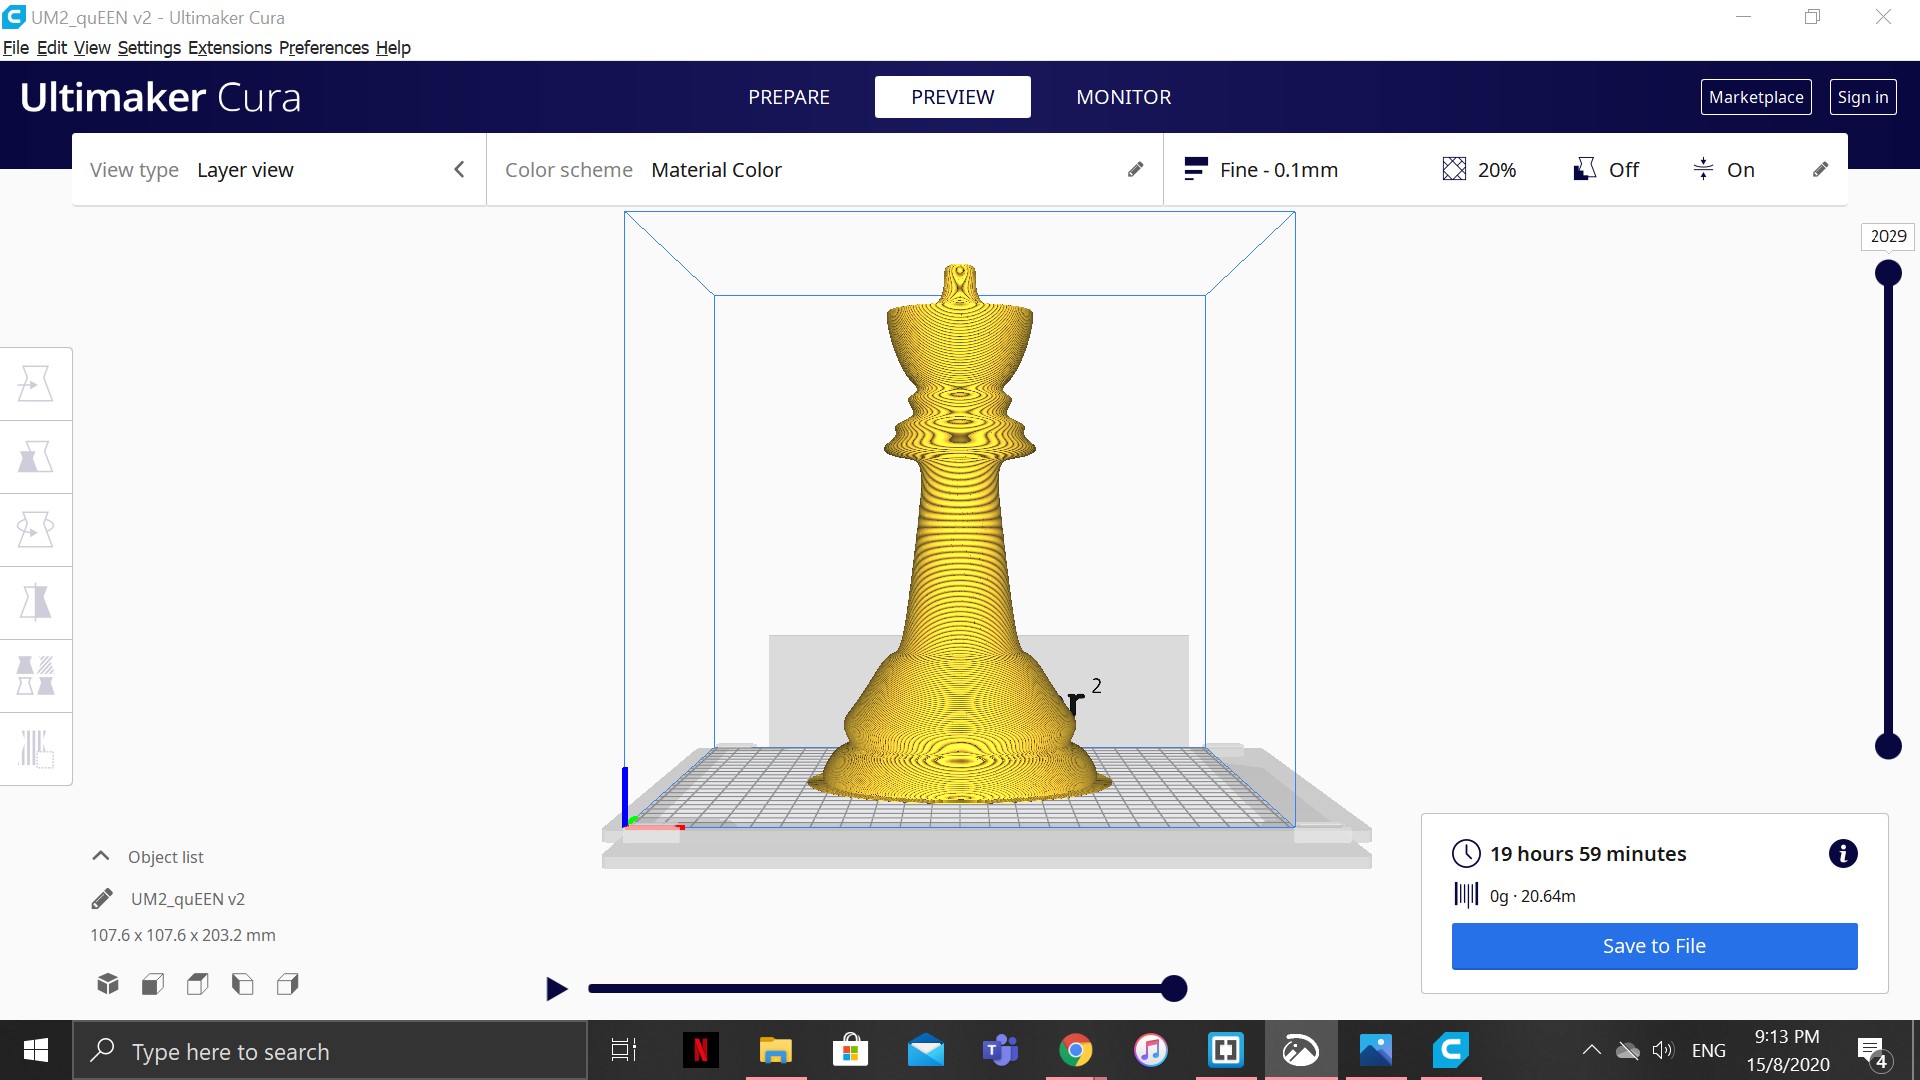
I will be using the Chess that i have created previously as an example to show you how the slicing of the model takes place. After you have completed your design on Fusion 360, export it and save it as an STL File. This process will depend on how big or small your design is. The smaller it is, the quicker it takes to export.
After it has finished exporting, open up your slicing software. The software that i use is Ultimaker Cura. Load up your STL file on the slicing software. After it loads, now you can choose the perimeter for it such as how high you want it to be, what material used, how fast you want the printing speed is and etc. After you have selected the options that you want, you can then slice it. Slicing it would give you the estimated time it would take for your model to print. This also depends on how big and small it is. You can now save it on your computer and transfer it to the the machine through USB for printing!